- Part 1 - In which we introduce PowerShell, encourage Windows 10 upgrades, and adopt Chocolatey.
- Part 2 - You are here
- Part 3 - In which we move to native SSH, update to
pwshand learn about the magic that is WSL.
In case you missed it, make sure to check out Part 1 of this series first--it'll introduce you to some improvements to the basic Windows command line experience that we'll be building on in this post.
Today, I'm going to be introducing some resources that'll allow us to improve our Git experience, and some utilities that'll allow us to completely overhaul the console experience altogether.
Git Gud🔗
For those not aware, Git is a popular version control system, in the same vein as SVN, TFS, or Mercurial. While it has GUI clients, the official release is a CLI-only tool, and advanced techniques are often difficult to accomplish in existing GUI clients.
If you don't already have a Git install you're happy with, let's go get one for you. Fire up your newly souped-up PowerShell client, and let's make Chocolatey work for us. choco list git will give us way too many results, but if we just do a choco install git it'll give us what we're after.
I'd also like to point out a nice feature of Chocolatey that I ran into while preparing for this post--I was trying to uninstall Git so I could do a fresh install, and got the following error:
choco uninstall git
Uninstalling the following packages:
git
git not uninstalled. An error occurred during uninstall:
    Unable to uninstall 'git 2.7.4' because 'poshgit 0.6.0.20160310' depends on it.

Chocolatey uninstalled 0/1 packages. 1 packages failed.
    See the log for details (C:\ProgramData\chocolatey\logs\chocolatey.log).
Failures
    - git
It detected that I had another package that depended on Git, and refused to allow it. If necessary, you can force uninstall of a package, but it's nice to have that safeguard.
Anyway, after Chocolatey finishes installing Git, it'll tell you that it added Git to your PATH, and that you should restart your shell, so let's follow its advice. Once we're back up and running, it's time to make using Git from PowerShell much easier with...
posh-git🔗
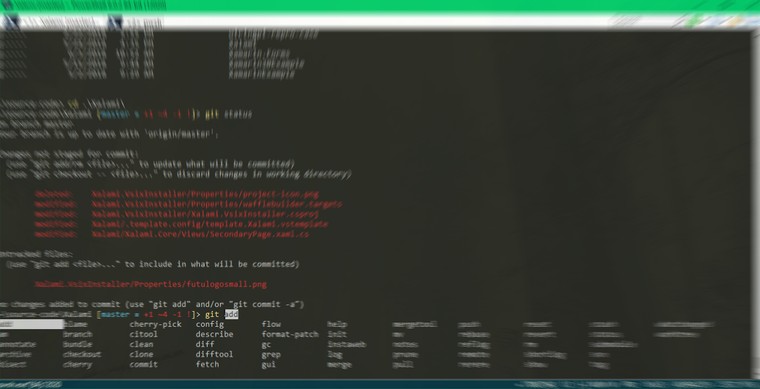
Note that that's not posh as in "fancy and upper-class", but rather short for PowerShell...though given the improvements it makes, I guess you could call it posh. posh-git adds tab completion for git commands, and modifies your prompt when you're in a folder that contains a git repository, like so:

posh-git is telling me that I'm currently on the master branch and the triple-equals indicates that I'm up to date with that branch. The green text indicates files that are staged for commit, and that I've added 0 new files, changed 1 file, and deleted zero files. The red text indicates files that are not staged for commit, and that, of those files, I've added 0 new files, changed 1 file, and deleted zero files.
The exact formatting and coloring of the prompt are user-customizable, but the defaults have always worked just fine for me.
Let's go grab it from the Chocolatey gallery EDIT (April 15, 2020): the Powershell Gallery, as the version in Chocolatey is woefully out of date!
PowerShellGet\Install-Module posh-git -Scope CurrentUser -AllowPrerelease -Force
(If asked to trust packages from the PowerShell Gallery, answer yes to continue installation of posh-git.
If the AllowPrerelease parameter is not recognized, update your version of PowerShellGet to >= 1.6,
by running Install-Module PowerShellGet -Scope CurrentUser -Force -AllowClobber, for example.)
You might need to restart PowerShell after installation, but other than that it should Just Work™ . Entering a directory with a git repository should change your prompt. If you have an SSH key, posh-git will attempt to find it on PowerShell startup, and ask you for your passkey. This will allow you to do git push and git pull using SSH, which is nicer than doing so via HTTPS, because you don't need to authenticate with a username and password every time.
If you find that it's not working, you may need to modify your PowerShell profile. You can find its location by typing $profile in a PowerShell prompt. If you try to navigate to that location and find that it doesn't exist, you can just create it yourself. By default, posh-git adds a module import to your profile. If posh-git's not working, and the import isn't there, you can just add it yourself:
# Load posh-git example profile
Import-Module posh-git
My favorite feature of posh-git is probably the way its tab-completion interacts with PSReadLine's Ctrl + Space autocompletion. If you type git, and then press Ctrl + Space, you get a list of possible git commands.

Which is just nifty.
Leveling Up🔗
In the previous post, I mentioned that we'd be extending some goodness of the Windows 10 console to non-Windows 10 machines. It's time we talked about how we'll be doing that. Our secret here today is replacing our default consoles with wrapper applications, sometimes called terminal emulators or console emulators.
There are several options, all with their own pros, cons and idiosyncrasies. Among the most popular are:
- Windows Terminal ADDED APRIL 15, 2020: The official(!) Windows Terminal with tabs, VT-100 and UTF-8 support. Still in prerelease at time of writing, but very usable, and my current daily driver.
- ConEmu
- Cmder, a fork of ConEmu with a different color scheme and a focus on portability.
- Console2
- ConsoleZ, a fork of Console2 updated for better rendering on Windows Vista and above, and with many more options.
- Hyper a cross-platform console that uses Electron, and extensible via Javascript and web technologies.
All of them give you tabs, the ability to host multiple different shells in a single window and better editing and selection at the very least.
ConEmu, Cmder, ConsoleZ, Hyper, and the Windows Terminal are all active projects with frequent updates. In the interest of keeping this post focused, I'm only going to be talking about the one I have the most experience with: ConEmu. There are plenty of other posts on the internet that discuss the alternatives, and you should feel free to make your own choice.
ConEmu🔗
Here's what my ConEmu looks like on startup.
Hello, world!
And here's what it looks like when I'm in the middle of doing some git-wrangling for a little experimental project.
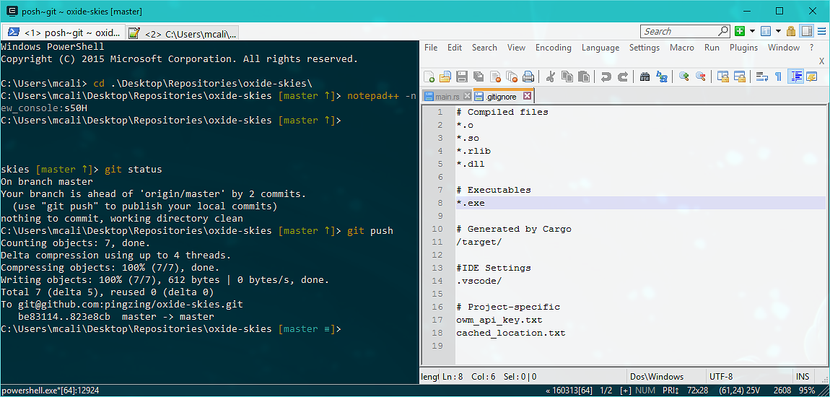
Okay, so it's not exactly rocket-science-git.
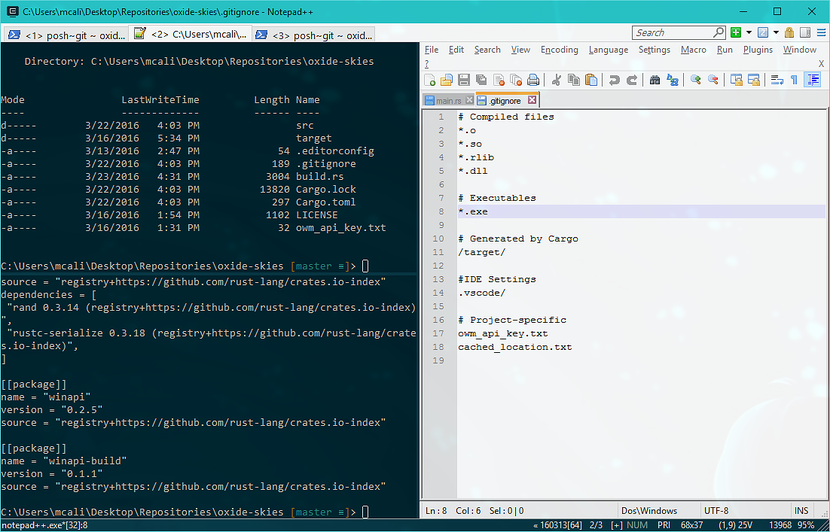
Yep, that's an instance of Notepad++ hosted in ConEmu in a split tab.
Right out of the box, ConEmu comes with a number of preset shells already set up. When I installed it, it knew how to open PowerShell, cmd.exe, git bash, and adding more is remarkably simple.
If you're convinced, then let's go get ConEmu, again using Chocolatey.
choco install conemu
Cmder, ConsoleZ and Hyper also have packages on Chocolatey, so if those are more your style, you can feel free to grab them instead.
Once ConEmu is installed, close out of your PowerShell window, and fire up your shiny new ConEmu install. You've probably got a little bit of configuring to do before it's comfortable, and I have some recommendations.
Hotkeys🔗
Make your way to Settings -> Keys & Macro, and change the following:
- "Create new console or new window (check 'Multiple in one ConEmu window')" from its default to Ctrl + T.
- "Close current tab: Close(6)" from its default to Ctrl + F4.
I prefer those settings, because they mimic browser behavior, which is the only other place I use a lot of tabs.
You should also skim through the other hotkeys while you're in here. A lot of shortcuts use the "Apps" key, a seldom-used key that usually lives between Right-Alt and Right-Ctrl, but is missing from quite a few keyboard layouts, especially on laptops. If you see anything using the Apps key that looks useful to you, consider rebinding it to something more accessible.
Selection🔗
This one is only for the Windows 10 folks. I actually like PSReadLine's keyboard-selection better than ConEmu's, because it only allows selection of the current command buffer. ConEmu's keyboard-based selection allows selection of the current command buffer, the prompt, and everything above it.
To disable ConEmu's keyboard-selection, make your way to: Settings -> Keys & Macro -> Mark/Copy. Once there, look to the bottom of the panel, and disable the Start selection with Shift+Arrow (Text = Left/Right/Home/End, Block = Up/Down) option.
Once you've got everything set up the way you like it, take it for a test run. ConEmu alone has more options than I've personally experimented with, so I certainly can't discuss them all in a single blog post! And if you're curious, the command that I used to create a new split tab with Notepad++ was notepad++ -new_console:s. You can find more details on the -new_console syntax (and a whole more) in ConEmu's documentation for creating a new console. I should also note that notepad++ is in my PATH, so I didn't need to give the shell the entire canonical path to its .exe.
In Closing🔗
If you've followed this series from start to finish, you may have gone from something like this:
Boooo!
To something like this:
Yaaaay!
And even if your own console's transformation wasn't quite as dramatic, I hope I was able to introduce you to some new tools, like Chocolatey and PackageManagement!
If you've got any feedback, feel free to get in touch on Twitter (@pingzingy) or GitHub (pingzing)!
Part 3 is now available here!

This work is licensed under a Creative Commons Attribution 4.0 International License.
Originally posted on the Futurice blog at https://www.futurice.com/blog/a-saner-windows-command-line-part-2/
Modified slightly upon reposting to this blog to add a mention for Hyper, and remove out-of-date posh-git info
Updated April 15, 2020 to add information about Windows Terminal