This is a series!🔗
Part one: Running Stable Diffusion on Windows with an AMD GPU
Part two: You're here!
This is a follow-up to my previous post, which explains how to get Stable Diffusion up and running on Windows for folks with an AMD GPU.
Now that I've been playing around with it myself for a few days, and had some opportunities to chat with others likewise, I'd like to share a handful of updates and discoveries.
Namely:
- An updated version of the Python script from the previous post, now with CLI args
- How to disable the safety checker (and why it sometimes causes black squares)
- How to use different schedulers (e.g. the DDIM Scheduler)
Updated Python Script🔗
Since the last post, I've cleaned up the Python script I've been using to invoke Stable Diffusion. The new version now allows for all the parameters to be passed in directly from the CLI--no need to edit the Python code by hand.
It adds one more requirement, a Pip package called "Click" that makes parsing CLI arguments very simple. Make sure you've got your virtual environment activated (virtualenv/Scripts/Activate.ps1 or virtualenv\Scripts\activate.bat), and run:
pip install click
... and you'll be ready to rock.
The updated Python script looks like this:
import click
from diffusers import StableDiffusionOnnxPipeline
import numpy as np

@click.command()
@click.option("-p", "--prompt", required=True, type=str)
@click.option("-w", "--width", required=False, type=int, default=512)
@click.option("-h", "--height", required=False, type=int, default=512)
@click.option("-st", "--steps", required=False, type=int, default=25)
@click.option("-g", "--guidance-scale", required=False, type=float, default=7.5)
@click.option("-s", "--seed", required=False, type=int, default=None)
def run(
    prompt: str,
    width: int,
    height: int,
    steps: int,
    guidance_scale: float,
    seed: int):

    pipe = StableDiffusionOnnxPipeline.from_pretrained(
        "./stable_diffusion_onnx",
        provider="DmlExecutionProvider"
    )

    # Generate our own latents so that we can provide a seed.
    seed = np.random.randint(np.iinfo(np.int32).max) if seed is None else seed
    latents = get_latents_from_seed(seed, width, height)

    print(f"\nUsing a seed of {seed}")
    image = pipe(prompt, height=height, width=width, num_inference_steps=steps, guidance_scale=guidance_scale, latents=latents).images[0]
    image.save("output.png")

def get_latents_from_seed(seed: int, width: int, height:int) -> np.ndarray:
    # 1 is batch size
    latents_shape = (1, 4, height // 8, width // 8)
    # Gotta use numpy instead of torch, because torch's randn() doesn't support DML
    rng = np.random.default_rng(seed)
    image_latents = rng.standard_normal(latents_shape).astype(np.float32)
    return image_latents

if __name__ == '__main__':
    run()
You can also find it directly on GitHub if that's more your style.
It takes up to six parameters, only one of which is required:
-por--promptis required, and is the text prompt you'd like to generate an image from.-wor--widthis optional, defaults to 512, and must be divisible by 8.-hor--heightis optional, defaults to 512, and must be divisible by 8-stor--stepsis optional, defaults to 25, and is the number of iterations that will be performed on your prompt. Generally speaking, the higher this number is, the better quality the output.-gor--guidance-scaleis optional, defaults to 7.5, and is how heavily the AI will weight your prompt versus being creative.0means that the AI will take a great deal of creative liberty.20or higher means that it attempt to rigidly adhere to the prompt.-sor--seedis optional, defaults to a randomly generated 32-bit integer, and is the value used as a seed for generating randomness. The same prompt with the same seed will produce the same output.
With these modifications, you can now invoke the script like so:
.\text2img.py -st 25 -p "A happy cat in a cyberpunk garden, cartoony style, digital painting, artstation, concept art, smooth, sharp focus, illustration, 8k"
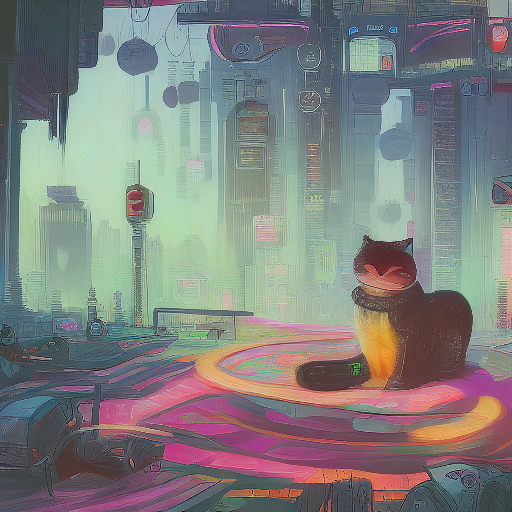
Voila!
Disabling the Safety Checker🔗
You may have noticed that, sometimes, instead of generating something useful, your output image will just be a blank, black square. This isn't a bug, or an error--this is because Stable Diffusion's built in Safety Checker has detected content that is either NSFW, or otherwise objectionable.
Now, if this you find that this is a useful feature, you could just detect it and print out a message, by doing something like this in the Python script:
result = pipe(prompt, height=height, width=width, num_inference_steps=steps, guidance_scale=guidance_scale, latents=latents)
image = result.images[0]
is_nsfw = result.has_nsfw_concept
if is_nsfw:
    print("Oh no! NSFW output detected!")

image.save("output.png")
...but for my use case, I'm only running this locally, and I don't really care if the AI occasionally generates some boobs. As an extra bonus, I've observed that if I disable the safety checker, I get a pretty significant speedup--somehwere between 20% and 40%, which usually shaves around a minute off my runtime. Not bad! So, if you'd like to disable the safety checker, all you have to do is add the following line after the declaration of pipe:
# .... etc
pipe = StableDiffusionOnnxPipeline.from_pretrained(
    "./stable_diffusion_onnx",
    provider="DmlExecutionProvider"
)

# Add this line here!
pipe.safety_checker = lambda images, **kwargs: (images, [False] * len(images))
# ... etc
This is a tiny bit of a hack--we're messing around with the internals of pipe, which aren't really meant to be used externally, but dynamic languages gonna dynamic language. We replace the safety_checker member of pipe with what is basically a dummy function that unconditionally returns false.
Now, no more black squares! Just beware, you now have a high likelihood of generating stuff you probably don't want to open up at work.
Using Different Schedulers🔗
Stable Diffusion can use a number of different sampling methods, which the diffusers package refers to as "schedulers" internally. The details of all of these are, frankly, not something I've investigated in great detail. The short version is that the characteristics of what they output, particularly at lower numbers of steps, tend to vary. For that reason, it can be useful to sometimes use a different scheduler. To use a different one, you have to construct it manually, and then pass it into the call to from_pretrained(). For example:
# Up in your imports, add the DDIMScheduler from diffusers
import click
import diffusers import StableDiffusionOnnxPipeline, DDIMScheduler
import numpy as np

# Skipping a few lines for brevity...

# Constructing the DDIMScheduler scheduler manually:
scheduler = DDIMScheduler(beta_start=0.00085, beta_end=0.012, beta_schedule="scaled_linear", num_train_timesteps=1000)

# And telling the created pipe to use it:
    pipe = StableDiffusionOnnxPipeline.from_pretrained(
        "./stable_diffusion_onnx",
        provider="DmlExecutionProvider",
        scheduler=scheduler
    )
...however, if you run this as-is, it won't work. You'll get an arcane error along the lines of "expected np.int64, got np.int32".
Fixing this requires two things, the first of which is immensely hacky.
The first thing🔗
We need to go modify our local version of Stable Diffusion's Onnx pipeline. In order to find it, go look in virtualenv\Lib\site-packages\diffusers\pipelines\stable_diffusion\ in whatever folder you have your virtual environment set up in.
Once in there, find pipeline_stable_diffusion_onny.py. That's our target here. Open it up, head down to line 133. We're going to change it from:
# OLD
sample=latent_model_input, timestep=np.array([t]), encoder_hidden_states=text_embeddings
into...
# NEW
sample=latent_model_input, timestep=np.array([t], dtype=np.int64), encoder_hidden_states=text_embeddings
We're now specifying the dtype in our call to np.array().
Remember that this change won't survive if you recreate your virtual environment, reinstall the diffusers package, or update the diffusers package. I fully expect the need for this to go away in the next release of diffusers anyway.
The second thing🔗
Once the diffusers package has been modified, you need to make a tiny change to how we declare our scheduler. Let's reuse our DDIM scheduler example.
Instead of doing this:
# Wrong
scheduler = DDIMScheduler(beta_start=0.00085, beta_end=0.012, beta_schedule="scaled_linear", num_train_timesteps=1000)
...do this:
# Right
scheduler = DDIMScheduler(beta_start=0.00085, beta_end=0.012, beta_schedule="scaled_linear", num_train_timesteps=1000, tensor_format="np")
(I believe the reason for this is because we're using Onnx and not Torch, we need to tell the scheduler to use Numpy's tensor format, and not Torch's. I think. I'm no expert on this.)
Once you've done Thing One and Thing Two, you should now be able to use the other schedulers. Examples of constructing them can be found in HuggingFace's diffusers repository.
For an example of what all this looks like when put together, take a look at the version I have in GitHub.
Disclaimer: I've only tried the DDIM scheduler myself--my GPU is a touch under-powered, and I mostly just wanted to run something that would generate acceptable results in fewer steps. If you have any success in getting the others running, feel free to leave a comment!
Wrapping Up🔗
I think that's all I've got for this one. A CLI-ified version of the script from last time, disabling the safety checker to win some speed (and possible salacious output), and enabling other schedulers when using the Onnx pipeline. Not bad for a few days of tinkering.
Some additional thanks to ponut64 in the comments of the last post, and AzuriteCoin for confirming the Onnx scheduler fix.
One extra thought: one thing I might do in the future is enhance my little CLI script to allow the caller to choose which scheduler to use. I'll have to play around with that a bit more, but watch this space if you're interete in such a thing (and don't just hack it together yourself).
Thanks for reading! As ever, I can be found on GitHub as pingzing and Twitter as @pingzingy. Happy generating!
 The text of this blog post is licensed under a Creative Commons Attribution 4.0 International License.
Luxion
Mon, Sep 19, 2022, 19:00:40We can bypass that by running the rest of the code in a while loop for which the amount of loops should be an optional arg (default 1) passed through the command. Just something I thought it was worth mentioning potentially for your next guide update.
Again, thanks for doing this and please keep an eye on the incoming img2img+inpaint onnx repo.
Neil
Tue, Sep 20, 2022, 11:41:33Adam
Tue, Sep 20, 2022, 19:16:39python '.\text2img.py' -p "a cat sitting on a rusted car landscape" -w 1024 -h 1024 -g 13
2022-09-20 13:59:55.9690752 [W:onnxruntime:, inference_session.cc:490 onnxruntime::InferenceSession::RegisterExecutionProvider] Having memory pattern enabled is not supported while using the DML Execution Provider. So disabling it for this session since it uses the DML Execution Provider.
2022-09-20 13:59:56.2614650 [W:onnxruntime:, session_state.cc:1198 onnxruntime::VerifyEachNodeIsAssignedToAnEp] Some nodes were not assigned to the preferred execution providers which may or may not have an negative impact on performance. e.g. ORT explicitly assigns shape related ops to CPU to improve perf.
2022-09-20 13:59:56.2653808 [W:onnxruntime:, session_state.cc:1200 onnxruntime::VerifyEachNodeIsAssignedToAnEp] Rerunning with verbose output on a non-minimal build will show node assignments.
2022-09-20 13:59:58.0183008 [W:onnxruntime:, inference_session.cc:490 onnxruntime::InferenceSession::RegisterExecutionProvider] Having memory pattern enabled is not supported while using the DML Execution Provider. So disabling it for this session since it uses the DML Execution Provider.
2022-09-20 13:59:58.0897282 [W:onnxruntime:, session_state.cc:1198 onnxruntime::VerifyEachNodeIsAssignedToAnEp] Some nodes were not assigned to the preferred execution providers which may or may not have an negative impact on performance. e.g. ORT explicitly assigns shape related ops to CPU to improve perf.
2022-09-20 13:59:58.0966059 [W:onnxruntime:, session_state.cc:1200 onnxruntime::VerifyEachNodeIsAssignedToAnEp] Rerunning with verbose output on a non-minimal build will show node assignments.
2022-09-20 13:59:59.0341965 [W:onnxruntime:, inference_session.cc:490 onnxruntime::InferenceSession::RegisterExecutionProvider] Having memory pattern enabled is not supported while using the DML Execution Provider. So disabling it for this session since it uses the DML Execution Provider.
2022-09-20 13:59:59.2561741 [W:onnxruntime:, session_state.cc:1198 onnxruntime::VerifyEachNodeIsAssignedToAnEp] Some nodes were not assigned to the preferred execution providers which may or may not have an negative impact on performance. e.g. ORT explicitly assigns shape related ops to CPU to improve perf.
2022-09-20 13:59:59.2635000 [W:onnxruntime:, session_state.cc:1200 onnxruntime::VerifyEachNodeIsAssignedToAnEp] Rerunning with verbose output on a non-minimal build will show node assignments.
2022-09-20 14:00:00.4652889 [W:onnxruntime:, inference_session.cc:490 onnxruntime::InferenceSession::RegisterExecutionProvider] Having memory pattern enabled is not supported while using the DML Execution Provider. So disabling it for this session since it uses the DML Execution Provider.
2022-09-20 14:00:01.7090363 [W:onnxruntime:, session_state.cc:1198 onnxruntime::VerifyEachNodeIsAssignedToAnEp] Some nodes were not assigned to the preferred execution providers which may or may not have an negative impact on performance. e.g. ORT explicitly assigns shape related ops to CPU to improve perf.
2022-09-20 14:00:01.7129493 [W:onnxruntime:, session_state.cc:1200 onnxruntime::VerifyEachNodeIsAssignedToAnEp] Rerunning with verbose output on a non-minimal build will show node assignments.
ftfy or spacy is not installed using BERT BasicTokenizer instead of ftfy.
Using a seed of 50033
0%| | 0/26 [00:00
run()
File "C:\Users\Adam\Documents\stable-diffusion\virtualenv\lib\site-packages\click\core.py", line 1130, in __call__
return self.main(*args, **kwargs)
File "C:\Users\Adam\Documents\stable-diffusion\virtualenv\lib\site-packages\click\core.py", line 1055, in main
rv = self.invoke(ctx)
File "C:\Users\Adam\Documents\stable-diffusion\virtualenv\lib\site-packages\click\core.py", line 1404, in invoke
return ctx.invoke(self.callback, **ctx.params)
File "C:\Users\Adam\Documents\stable-diffusion\virtualenv\lib\site-packages\click\core.py", line 760, in invoke
return __callback(*args, **kwargs)
File "C:\Users\Adam\Documents\stable-diffusion\text2img.py", line 30, in run
image = pipe(prompt, height=height, width=width, num_inference_steps=steps, guidance_scale=guidance_scale, latents=latents).images[0]
File "C:\Users\Adam\Documents\stable-diffusion\virtualenv\lib\site-packages\diffusers\pipelines\stable_diffusion\pipeline_stable_diffusion_onnx.py", line 132, in __call__
noise_pred = self.unet(
File "C:\Users\Adam\Documents\stable-diffusion\virtualenv\lib\site-packages\diffusers\onnx_utils.py", line 51, in __call__
return self.model.run(None, inputs)
File "C:\Users\Adam\Documents\stable-diffusion\virtualenv\lib\site-packages\onnxruntime\capi\onnxruntime_inference_collection.py", line 200, in run
return self._sess.run(output_names, input_feed, run_options)
onnxruntime.capi.onnxruntime_pybind11_state.RuntimeException: [ONNXRuntimeError] : 6 : RUNTIME_EXCEPTION : Non-zero status code returned while running Einsum node. Name:'Einsum_558' Status Message: D:\a\_work\1\s\onnxruntime\core\providers\dml\DmlExecutionProvider\src\MLOperatorAuthorImpl.cpp(1866)\onnxruntime_pybind11_state.pyd!00007FFFDACFA60A: (caller: 00007FFFDACFBC0F) Exception(3) tid(16c4) 80070057 The parameter is incorrect.
Hopefully you can pull more from that than me. Also hopefully the problem isn't only on my end :)
Thanks for your work on this, been having a great time.
Neil
Tue, Sep 20, 2022, 20:27:00I have vague memories of the Onnx pipeline being limited to 512x512 right now. Hopefully as Onnx support matures, that limitation will go away. Keep on eye on Hugging Face's diffusers repo, I suppose.
Brian
Tue, Sep 20, 2022, 22:06:54Also, here's a basic implementation of opening the pipe then running multiple iterations like luxion says
import click
from diffusers import StableDiffusionOnnxPipeline
import numpy as np
@click.command()
@click.option("-p", "--prompt", required=True, type=str)
@click.option("-w", "--width", required=False, type=int, default=512)
@click.option("-h", "--height", required=False, type=int, default=512)
@click.option("-st", "--steps", required=False, type=int, default=25)
@click.option("-g", "--guidance-scale", required=False, type=float, default=7.5)
@click.option("-s", "--seed", required=False, type=int, default=None)
@click.option("-i", "--iter", required=False, type=int, default=1)
def run(
prompt: str,
width: int,
height: int,
steps: int,
guidance_scale: float,
seed: int,
iter: int):
pipe = StableDiffusionOnnxPipeline.from_pretrained(
"./stable_diffusion_onnx",
provider="DmlExecutionProvider"
)
# Add this line here!
pipe.safety_checker = lambda images, **kwargs: (images, [False] * len(images))
# ... etc
first_iter = True
for i in range(iter):
# Generate our own latents so that we can provide a seed.
if first_iter == True:
seed = np.random.randint(np.iinfo(np.int32).max) if seed is None else seed
first_iter = False
else:
seed = np.random.randint(np.iinfo(np.int32).max)
latents = get_latents_from_seed(seed, width, height)
print(f"\nUsing a seed of {seed}")
image = pipe(prompt, height=height, width=width, num_inference_steps=steps, guidance_scale=guidance_scale, latents=latents).images[0]
image.save("output_" + str(i) + ".png")
def get_latents_from_seed(seed: int, width: int, height:int) -> np.ndarray:
# 1 is batch size
latents_shape = (1, 4, height // 8, width // 8)
# Gotta use numpy instead of torch, because torch's randn() doesn't support DML
rng = np.random.default_rng(seed)
image_latents = rng.standard_normal(latents_shape).astype(np.float32)
return image_latents
if __name__ == '__main__':
run()
Eric
Wed, Sep 21, 2022, 13:27:58Wolfy
Wed, Sep 21, 2022, 16:01:37Mike
Fri, Sep 23, 2022, 00:46:37quickwick
Sun, Sep 25, 2022, 21:41:01I've been playing with this for the past few days. I ended up hacking together a basic Tkinter-based GUI to make experimentation faster/easier. Hopefully other people find it useful. https://github.com/quickwick/stable-diffusion-win-amd-ui
Rosh
Fri, Sep 30, 2022, 00:30:13I do have a lot of output saying "Having memory pattern enabled is not supported while using the DML Execution Provider. So disabling it for this session since it uses the DML Execution Provider." and I'm not sure if that's normal; but there don't seem to be any issues.
Anxst
Sun, Oct 02, 2022, 19:38:01Thanks for all the great info!
MindLeaker
Sun, Oct 02, 2022, 22:37:16Ray
Tue, Oct 04, 2022, 17:20:55Around 30sec per iteration.
Sadly, 512x512 is my limit too.
Changing the pipe output size + changing the latent size gets it to "work" for me, but throws "Not enough memory" errors!
I'm so close but so far away. :'(
Also, found users using inpainting with this, and am excited to give that a try.
Currently trying to figure out textual inversion.
Ruben
Tue, Oct 04, 2022, 22:50:13Thanks for the guide I will add my gradio UI implementation
Wed, Oct 05, 2022, 13:44:01import gradio as gr
[code]
#image GRID (currently not used because can't generate more than 1)
def image_grid(imgs, rows, cols):
assert len(imgs) == rows*cols
w, h = imgs[0].size
grid = Image.new('RGB', size=(cols*w, rows*h))
grid_w, grid_h = grid.size
for i, img in enumerate(imgs):
grid.paste(img, box=(i%cols*w, i//cols*h))
return grid
#num_images = 3
#gr.Interface.from_pipeline(pipe).launch()
def predict(text,steps,height,width,scale,strenght,batch_count,batch_size):
# text = [text] * num_images
images = pipe(prompt=text, height=height, width=width, num_inference_steps=steps, guidance_scale=scale, denoising_strength=strenght, batch_count=batch_count, batch_size=batch_size, eta=0.0, execution_provider="DmlExecutionProvider")["sample"][0]
# grid = image_grid(images, rows=1, cols=num_images)
return(images)
gr.Interface(
predict,
title = "Stable Diffusion ONNX",
allow_flagging="never",
inputs = [
gr.Textbox(label = 'Prompt text', lines=2, elem_id="text"),
gr.Slider(minimum=1, maximum=150, step=1, label="Sampling Steps", value=10, elem_id="steps"),
gr.Slider(minimum=64, maximum=2048, step=64, label="Width", value=512, elem_id="height"),
gr.Slider(minimum=64, maximum=2048, step=64, label="Height", value=512, elem_id="width"),
gr.Slider(minimum=1, maximum=10, step=0.5, label='Guidance Scale', value=7.5, elem_id="scale"),
gr.Slider(minimum=0.0, maximum=1.0, step=0.01, label='Denoising strength', value=0.7, elem_id="strenght"),
gr.Slider(minimum=1, maximum=1, step=1, label='Batch count', value=1, elem_id="batch_count"),
gr.Slider(minimum=1, maximum=1, step=1, label='Batch size', value=1, elem_id="batch_size"),
# gr.Slider(minimum=1, maximum=4, step=1, label="How Many Images?", value=1, elem_id="num_images") #not working
# gr.Image(source = 'canvas', type = 'pil') #not working
#Batch count and size limited to max 1 (currently not working)
],
outputs = [
gr.Image()
]
).launch(debug=True)
[/code]
A-gratefull-noob
Wed, Oct 05, 2022, 15:43:49Second: it does work till this update.
I updated the script, or to be more precise I do have now text2img.py 1 to 3. 3 being the newest. If I try to use it.. nothing happens. I suspect its because there isnt a diffuser folder to be found anywhere. I tracked back your installation and cant find a promt to create this so I assume it should have created itself.. but it didnt.. any Idea why?
SerzaNT
Fri, Oct 07, 2022, 14:58:48Haeden
Fri, Oct 07, 2022, 15:23:59Is there a way to get the additional models working with this method like GFPGAN, RealESRGAN, and LDSR?
I have this working with my old RX580, I'm upgrading soon, I really want a 6800xt but if AMD limits me to these workarounds I may spring for an Nvidia card.
Thanks for the guide and update!
John6800XT
Sat, Oct 08, 2022, 01:44:44But I noticed that it really wasn't pushing my GPU all that hard, so I went into Adrenaline and forced the minimum frequency to be around 2300MHz. This got me to about 1.3it/s (note the unit flip). So about a 63% increase! But it's clearly still leaving performance on the table because the temperatures hardly go up at all.
For comparison, I was generating single images with similar settings on my laptop with a 1660-ti at a pretty similar pace. But the 6GB of vRAM was definitely a limitation.
However, when I did a Linux variation back on my desktop again (using ROCm), I was able to generate 6-image batches with 50 steps in about 40 seconds if my memory serves. So naiively that's something like 12x faster than through DirectML on Windows. And it noticeably pushed the GPU. Makes me really wish AMD would get ROCm working on WSL2 or Windows natively ASAP. Some forum sleuthing suggests it may be discretely in the works, but there's no official word about any attempt to make ROCm work with Windows. *sigh*
JohnP
Sat, Oct 08, 2022, 22:01:27I have been using painting programs like Blender and the Gimp for years but very new to AI art.
Also have a couple questions:
1) What makes this an AMD tutorial? I don't understand what I did that makes it work AMD and not on Nvidia or CPU.
2) If I wanted to test against CPU or Nvidia, what would I need to change?
JohnP
Sat, Oct 08, 2022, 22:02:29VodkaMartini
Mon, Oct 10, 2022, 09:58:21Pull request is failed in check, and It's been left unattended for 22 days.
Disappointed.
https://github.com/huggingface/diffusers/pull/552
Jojo
Mon, Oct 10, 2022, 18:13:56Garanault
Tue, Oct 11, 2022, 01:56:20Thanks again for this great resource, Neil!
Neil
Wed, Oct 12, 2022, 10:53:27Huh, that's interesting. May tinker with that a bit this weekend. Thanks for the heads-up.
Paul B
Sun, Oct 16, 2022, 00:26:21Setting a save directory for images with:
imagepath = "C:\\Users\\yourusername\\path\\to\\imagedirectory\\" (double blackslashes required)
image.save(imagepath + imagename)
Appending the seed number to saved images with:
imagename = "output-" + str(seed) + ".png"
Using a batch file to open Windows Terminal, which changes to my stable-diffusion directory, and loads the powershell environment:
wt PowerShell.exe -NoExit -Command "(cd C:\Users\yourusername\path\to\stable-diffusion),(.\virtualenv\Scripts\Activate.ps1)"
Bob
Mon, Oct 17, 2022, 17:14:48Zerg
Thu, Oct 20, 2022, 16:31:41VodkaMartini
Sun, Oct 23, 2022, 12:14:25https://github.com/huggingface/diffusers/releases/tag/v0.6.0
Jean
Wed, Oct 26, 2022, 07:14:29convert_original_stable_diffusion_to_diffusers.py // it's not really working, anyone knows another way?
hex
Wed, Oct 26, 2022, 20:57:14hex
Wed, Oct 26, 2022, 21:06:52for %%f in (*.ckpt) do (
python convert_original_stable_diffusion_to_diffusers.py --checkpoint_path="./%%f" --dump_path="./%%~nf-diff"
IF ERRORLEVEL 1 GOTO errorHandling
python convert_stable_diffusion_checkpoint_to_onnx.py --model_path="./%%~nf-diff" --output_path="./%%~nf-onnx"
IF ERRORLEVEL 1 GOTO errorHandling
)
:errorHandling
hex
Wed, Oct 26, 2022, 21:36:45Jean
Wed, Oct 26, 2022, 22:58:24"RuntimeError: Error(s) in loading state_dict for CLIPTextModel"
Missing key(s) in state_dict: "text_model.embeddings.position_ids", "text_model.embeddings.token_embedding.weight........." and goes on."
So i doesn't succeed to convert the novelAI ckpt to onnx. YET.
But on another dir ( novelaileakpt2/prodmodels ) has a bunch of .pt files with, maybe we can get something there.
hex
Thu, Oct 27, 2022, 08:12:47The issue mentioned above about the schedulers not working with the modification is being looked into on their github, so hopefully that'll be fixed soon. You CAN get DDIM working with the fix proposed in the ticket, but not LMS.
Jean
Thu, Oct 27, 2022, 21:08:00But unfortunately, the novelAI model.ckpt is the only one that i cannot convert utilizing "convert_original_stable_diffusion_to_diffusers.py", i tried with f111, sd1.4, sd1.5 all of them works fine.
I merged novel AI (berry mix) like you did, but i still receives the same error:
Traceback (most recent call last):
File "convert_original_stable_diffusion_to_diffusers.py", line 673, in
checkpoint = checkpoint["state_dict"]
KeyError: 'state_dict'
I did try the convert script from Luxion (20/10/2022 14:03:19) on his PasteBin, but no lucky too. I tried some other models from novel AI leak, always the same KeyError: 'state_dict' error for everyone.
Now i got really stuck, who knows someone knows a solution. Thanks guys, awesome tutorial.
hex
Thu, Oct 27, 2022, 21:58:57It's working great here. If NovelAI wasn't proprietary I'd put my berry mix onnx conversion up on mega for you, but this isn't the place to share that. I can't believe the difference in results from all the other models to this Berry mix. It's quite amazing.
TK
Sun, Oct 30, 2022, 11:59:18Any chance you have any tips on how you're getting 30sec/image on an RX 580? at 512x512 with 50 steps I'm at 3mins 30sec per.
JohnP
Mon, Oct 31, 2022, 15:16:40hex
Wed, Nov 02, 2022, 05:56:24- If you converted your models with 0.5.0 (or perhaps before), you will need to edit the config files (model_index.json) for them. You will need to add four lines:
"vae_encoder": [
"diffusers",
"OnnxRuntimeModel"
]
These were not put in the configs for whatever reason, and because of that you can not load them as pretrained models. Next, to get ALL of the schedulers working, you'll need to edit pipeline_onnx_stable_diffusion.py. At line 152, before the line starting with "latents = " add this:
import torch
latents = torch.tensor(latents)
Around line 170 you should see a familiar line from the guide - you're going to do the same thing. Change
FROM: sample=latent_model_input, timestep=np.array([t]), encoder_hidden_states=text_embeddings
TO: sample=latent_model_input, timestep=np.array([t], dtype=np.int64), encoder_hidden_states=text_embeddings
And finally, around line 180, you'll find this line:
latents = self.scheduler.step(noise_pred, t, latents, **extra_step_kwargs).prev_sample
BEFORE it, add
latents = torch.tensor(latents)
These modifications are because, as the guide indicates, you can no longer put tensor_format="np" in your scheduler calls, but the schedulers aren't fixed (see github issue #967). This fixes it so you don't need the tensor_format in your scheduler calls, and all three schedulers DO work.
The only other issue using this guide is that at some point you need to do a pip install torch, which is not mentioned in the guide. I had no other issues getting diffusers 0.6.0 to work using this guide and doing a clean install (I simply didn't specify diffusers==0.5.0 in the pip install line). Happy generating everyone.
Luxion
Mon, Nov 07, 2022, 21:26:32@Neil if you want me to share the UI to give you some insights on your (potential) next guide update - just say the word.
John6800XT
Mon, Nov 14, 2022, 22:39:37I'd also like to report the good news that the ort_nightly_directml-1.14.0.dev20221110006-cp38-cp38-win_amd64 package seems to have resulted in something like a 3X increase in performance on my 6800XT. Just generated a 512x512 image with 3.21it/s! Still behind what I achieved on Linux with Rocm, but this speedup definitely gives me hope for future optimizations even without Rocm.
Luxion
Wed, Nov 16, 2022, 05:33:18Hero you go: https://mega.nz/folder/XMxEmZZT#AGokxgNtyphqDHNCbkosGw
Luxion
Wed, Nov 16, 2022, 17:04:41Thank you for the tip about the latest nightly! I also got a significant inference speed boost although with my RX 560 4G it was only about 33% increase - still good! There's only so much they can improve on low VRAM cards after all.
One thing I noticed is diffusers do not actually import the nightly version of directml and instead it tries to import from any of these packages: "onnxruntime", "onnxruntime-gpu", "onnxruntime-directml", "onnxruntime-openvino". So I'm saying this because there is a chance that you might not actually be taking advantage of the lastest version of onnx directml - if you had installed onnxruntime previously. Check the comment I just posted in the part 1 of Neil's guide.
Also if you tried the UI please tell me your thoughts about it. There are some features I want to improve/add and might have to rewrite the whole thing using gradio.blocks() - I would like to avoid that if possible. Particularly I'm interested in being able to dynamically update the UI variables (including the outputs). If you find anything wrong and/or improve over it - please share.
Query
Sun, Nov 27, 2022, 18:58:57pipe = StableDiffusionOnnxPipeline.from_pretrained(
"./stable_diffusion_onnx",
provider="DmlExecutionProvider"
)
with
pipe = StableDiffusionOnnxPipeline.from_pretrained(
"./insert_other_model_here",
provider="DmlExecutionProvider"
)
or is it something else?
cstueckrath
Thu, Dec 01, 2022, 18:47:26Anonymous
Fri, Dec 02, 2022, 22:15:20https://github.com/nod-ai/SHARK/blob/main/shark/examples/shark_inference/stable_diffusion/stable_diffusion_amd.md
anonymous
Sat, Dec 17, 2022, 10:41:17Alexander
Tue, Dec 20, 2022, 18:44:55giorgio
Sun, Jan 01, 2023, 11:22:53brutal!
m8ax
Sun, Jan 01, 2023, 11:23:11Beleriandian
Sat, Jan 28, 2023, 02:29:22Luxion
Sat, Apr 01, 2023, 18:55:07https://github.com/lshqqytiger/stable-diffusion-webui-directml
Install that instead. Its essentially a ported version of famous Automatic1111 UI to work with DirectML which is compatible with most AMD cards - which means that every feature is working: Img2img/Inpaint, LoRAs, ControlNet, Upscalers, most extensions such as Dynamic Prompts, 3D open pose editor etc, etc...
Read the instructions on the github page. You should add these args to webui-user.bat like so:
set COMMANDLINE_ARGS=--precision full --no-half --no-half-vae --opt-sub-quad-attention --opt-split-attention-v1
If your GPU has LESS than 10Gb VRAM you might want to add this arg as well: --medvram
If your GPU has LESS than 6Gb VRAM add this instead: --lowvram
If your GPU has at least 4Gb, you followed the instructions correctly and still get 'not enough memory' kind of errors - then try it without the '--opt-sub-quad-attention' arg.
If you have troubles with SD failing to launch offline, add these: --skip-install --skip-version-check
Good luck, and enjoy your local free image generator!